Release 2.3
A58165-01
Library |
Product |
Contents |
Index |
| Oracle8 ConText Cartridge Administrator's Guide Release 2.3 A58165-01 |
|
![]()
![]()
This chapter provides details on how to use the command-line to set up and maintain text in ConText.
The process of administering text in a ConText system comprises the following tasks:
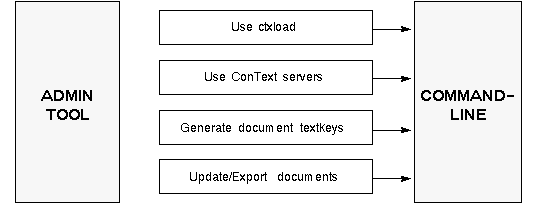
This section provides instructions for loading text into database columns from the command-line:
|
Note: The ConText Workbench includes an input/output (I/O) utility for loading/updating text from client-side files in a Windows environment to database columns, as well as exporting text from database columns to client-side files. For more information about using the ConText Workbench I/O utility, see Oracle8 ConText Cartridge Application Developer's Guide. |
Use ctxload to load text from a load file or from separate text files into the database.
For example:
ctxload -user jsmith/welcome -name MY_DOCS -file docs.txt -log docload.log
In this example, the Oracle user's username/password is jsmith/welcome. Because the -thes argument for ctxload isn't specified, by default, ctxload loads text, rather than a thesaurus, into the specified database table. The table to which the documents are loaded is my_docs and the load file being used is docs.txt.
In addition, this example generates a log file named docload.log.
|
See Also:
For a complete description of ctxload requirements and options, as well as the structure and syntax of the text load file, see Chapter 10, "Text Loading Utility". |
If you use the external data store (i.e. in your text column, you store pointers to documents in your file system), you can use ctxload to load the file pointers.
To use ctxload with external data store columns, the following conditions must exist:
For example:
<TEXTSTART: EMPNO=1010, ENAME='Mary Jones'>
mjones.pdf
<TEXTEND>
In this example, the file name mjones.pdf will be loaded into the LONG column for the table and the structured employee information, such as employee number (1010) and name (Mary Jones), will be loaded into the specified columns.
ConText servers can be used to automatically load text from files in an operating system directory as the directory is populated with files.
ConText uses ConText servers with the Loader personality to scan a specified directory for files and call ctxload to load all existing files in the directory into a specified column. The column and the directory to be scanned are specified in a text loading source created by the user.
To setup ConText servers for automated text loading, perform the following tasks:
For example:
begin
  ctx_ddl.set_attribute('DIRECTORIES', '/product/docs');
  ctx_ddl.create_preference('PRODUCT_DOCS_READER',
                            'Directory scanner for /private/docs',
                            'DIRECTORY READER');
end;
In this example, the name of the preference created is reader_pref. The directories attribute for the DIRECTORY READER Tile specifies the directory path and name for the directory to be scanned (/private/docs).
For example:
begin
  ctx_ddl.set_attribute('COMMAND', '/bin/convert.sh');
  ctx_ddl.create_preference('PRODUCT_DOCS_TRANSLATOR',
                            'script that converts files to ctxload format',
                            'USER TRANSLATOR');
	end;
In this example, the name of the preference created is reader_pref. The command attribute for the USER TRANSLATOR Tile specifies the location and the name of the translation program (a shell script named convert.sh).
|
Note: If the incoming files do not need to be converted, you can skip this step and use the predefined preference, DEFAULT_TRANSLATOR, in your text loading source. |
For example:
begin
  ctx_ddl.set_attribute('separate', 'Y');
  ctx_ddl.set_attribute('longsize',2000);
  ctx_ddl.create_preference('PRODUCT_DOCS_LOADER',
                            'text in separate files, max size of text 2MB',
                            'GENERIC LOADER');
end;
In this example, the separate attribute is set for the GENERIC LOADER Tile, which indicates that the text to be loaded by ctxload is stored in separate files and not in the load file. In addition, a value of 2000 Kilobytes (2 Megabytes) is specified for longsize, which sets the maximum size of the text to be loaded by ctxload.
|
Note: If the text to be loaded is stored directly in the load file and the amount of text for any given document is less than 64 Kilobytes, you can skip this step and use the predefined preference, DEFAULT_LOADER, in your text loading source. |
When you create a source, you specify the name of the source and the column to be loaded. You also specify the Reader, Translator, and Engine preferences that you created.
For example:
begin
  ctx_ddl.create_source('DOCS_SOURCE','DOCS.TEXT',
                        'basic source for documents in /product/docs',
                        reader_pref =>'PRODUCT_DOCS_READER'
                        translator_pref =>'PRODUCT_DOCS_TRANSLATOR',
                        engine_pref => 'PRODUCT_DOCS_LOADER');
end;
In this example, the source name is docs_source and the column to be loaded is text in a table named docs.
|
See Also:
For more information about sources and automated text loading, see "Sources" in Chapter 8, "Understanding the ConText Data Dictionary: Text Loading". |
For example:
ctxsrv -user ctxsys/passwd -personality R &
|
See Also:
For a complete description of ctxsrv, see "ctxsrv Executable" in Chapter 4, "ConText Server Executables and Utilities". |
Each document loaded into a table must be assigned a value in the primary key column of the table. This value serves as the textkey for the document.
Textkeys can be assigned using the following methods:
To manually embed textkey values for documents in the load file, in each document header, create an entry which specifies the name of the primary key column in the table and the textkey value to be assigned to the document.
For example:
. . .
<TEXTSTART: PK=1000, TITLE='DOC 1000'>
doc1000.txt
<TEXTEND>
<TEXTSTART: PK=1001, TITLE='DOC 10001'>
doc1001.txt
<TEXTEND>
. . .
In this example, the load file contains pointers to separate text files (doc1000.txt and doc1001.txt), rather than the text for each document. The primary key column for the table is pk and the values specified are loaded into pk when ctxload is run.
|
See Also:
For a complete description of the structure of the load file, see Chapter , "Structure of Text Load File" in Chapter 10, "Text Loading Utility". |
To automatically generate textkey values for each document loaded into a table, use the SQL command CREATE to create a trigger and sequence for the table.
The sequence generates unique values for each document. The trigger calls the sequence each time a row (document) is loaded into the table and stores the value in the primary key column for the table.
For example:
create sequence doc_seq;
create trigger doc_trigger
before insert on DOCS
for each row
  BEGIN
    select docs_seq.nextval into :new.pk from dual;
  END;
In this example, a sequence named doc_seq and a trigger named doc_trigger are created for a table named docs, in which the primary key column is pk.
doc_trigger specifies that the next available value generated by doc_seq is inserted into the docs table before each new row is inserted into the table.
This section provides details for using ctxload to update the text column for an existing document (row in the table) from an operating-system file or to export the contents of the text column for a row to an operating-system file.
To use ctxload to update/export a document, the document must already exist as a row in the table. To create the row, you can use ctxload or other text loading methods supported by Oracle.
If you are using the ConText Workbench, you can use the I/O Utility, which provides the same functionality, except it uses client-side files to perform the update/export.
|
See Also:
For a complete description of ctxload, see Chapter 10, "Text Loading Utility". For a description of the I/O Utility, see Oracle ConText Workbench User's Guide. |
To update an existing document, you can use ctxload in update mode. To specify update mode for ctxload, use the -update option and specify the name of the policy for the text column, the primary key of the row to be updated, and the file containing the updated text.
For example:
ctxload -user ctxdemo/passwd -update -name word_docs -pk 3452 -file /docs/resume1.doc
In this UNIX-based example, the row identified by primary key 3452, in the table for a policy named word_docs, is updated with the contents of resume1.doc located in /docs.
To export a document, you can use ctxload in export mode. To specify update mode for ctxload, use the -export option and specify the name of the policy for the text column, the primary key of the row to be exported, and the file to which the text is exported.
For example:
ctxload -user ctxdemo/passwd -export -name word_docs -pk 3452 -file /docs/new.doc
In this UNIX-based example, the contents of the text column for the row identified by primary key 3452, in the table for a policy named word_docs, are written to an operating system file named new.doc located in /docs.
This section provides details for using the CTX_DDL PL/SQL package to perform the following administration tasks for preferences:
In addition, this section describes the following tasks for specific types of preferences:
To create a preference in the ConText data dictionary, use the SET_ATTRIBUTE and CREATE_PREFERENCE procedures in CTX_DDL.
For example:
begin
  ctx_ddl.set_attribute ('PATH',
                         '/public/doc1:/public/doc2');
  ctx_ddl.create_preference ('PUB_DOCS',
                             'Docs stored in files',
                             'OSFILE');
end;
In this example, a Datastore preference named pub_docs is created for text stored externally in operating system files in a UNIX-based environment.
The path attribute for the OSFILE Tile specifies the directory paths and names (/pub/doc1 and /public/doc2) where the files are stored. A colon is used to separate the multiple directory paths/names.
To assign more than one value to the same Tile attribute, you must call SET_ATTRIBUTE separately for each value that you want to set before calling CREATE_PREFERENCE.
Currently, only the stop_word (GENERIC STOP LIST Tile), executable (BLASTER FILTER Tile), and keep_tag (GENERIC WORD LIST Tile) attributes support multiple values.
|
See Also:
For examples of specifying multiple attribute values for preferences, see "Creating Filter Preferences" and "Creating a Stoplist Preference" in this chapter. |
Each time CREATE_PREFERENCE is called, the buffer used to store the attributes for preferences is automatically cleared. As a result, if the preference creation failed, all of the attributes must be entered again before calling CREATE_PREFERENCE again.
If you enter an incorrect value for an attribute, you can override the attribute value by simply calling SET_ATTRIBUTE again for the same attribute. If you need to remove all of the attributes from the buffer, use the CTX_DDL.CLEAR_ATTRIBUTES procedure.
One of the most important preferences you create is an Engine preference. In the Engine preference for a policy, you specify the amount of indexing memory allocated for the column in the policy, as well as the STORAGE clauses used for the automatically-generated tables and Oracle indexes that comprise a ConText index.
Because ConText index strings for indexed tokens are stored in memory before they are saved to the ConText index tables, it is vital that you allocate as much indexing memory as possible to avoid excessive index fragmentation.
When you create an Engine preference, you use the index_memory attribute for the GENERIC ENGINE Tile to allocate indexing memory.
If you plan to use parallel indexing, the memory specified for the Engine preference should be the amount of real memory available divided evenly among the number of ConText servers that will perform the indexing in parallel.
For example, if you are going to use three ConText servers in parallel to create an index for a column and you have 100 Mb of memory available on the machine on which the servers will be running, you should create an Engine preference with index_memory set to 33 Mb, then specify the preference in the policy for the column.
The following example illustrates creating a Data Store preference for two tables with the following master/detail relationship:
To create a Data Store preference for use in a policy on the master table, use the MASTER DETAIL NEW Tile.
For example:
exec ctx_ddl.set_attribute('BINARY','0');
exec ctx_ddl.set_attribute('DETAIL_TABLE','DOCS_TEXT');
exec ctx_ddl.set_attribute('DETAIL_KEY','FK_DOCID');
exec ctx_ddl.set_attribute('DETAIL_LINENO','CHAPTER');
exec ctx_ddl.set_attribute('DETAIL_TEXT','TEXT');
exec ctx_ddl.create_preference('MDN','','MASTER DETAIL NEW');
exec ctx_ddl.create_policy('DOCS_POL','DOCS.COMMENT',textkey=>'DOCID',dstore_pref=>'MDN');
In this example, the text column for the policy is the comment column in master; however, ConText does not index the contents of this column. The column simply serves as the place-holder for the policy.
As such, any column in the master table, except for the textkey column, can serve as the text column for the policy; however, the DML trigger for the table always includes the text column. Any changes to the text column result in a reindexing request sent to the DML queue.
You may wish to create a dummy column in your master table for use as the text column so that changes to the column do not trigger reindexing requests. In the example above, every time comments changes, reindexing is performed on the text column for each row in the docs_text table that is associated with comments.
In addition, the dummy column, if named something appropriate (e.g. text or detail), makes one-step queries more intuitive to write.
For example:
alter table master add (text char(1));
exec ctx_ddl.create_policy('MY_POL','master.text',textkey => 'PK' dstore_pref=>'MY_MD')

select title
from master
where contains(text, 'Oracle')> 0;
When creating Filter preferences, the following considerations determine which Tiles and attributes you use, as well as the values that you specify for each attribute:
|
See Also:
For a complete list of the Tiles and attributes for Filter preferences, see the Filter section in "Filter Tiles" in Chapter 7, "Understanding the ConText Data Dictionary: Indexing". |
This section provides one example for internal filters in single-format columns and one example for mixed-format columns.
For a single-format column using one of the internal filters, create a Filter preference that sets the format attribute (BLASTER FILTER Tile) to the format used in your column.
The following example illustrates creating a Filter preference for a column that contains documents only in MS Word for Windows format:
begin
  ctx_ddl.set_attribute('FORMAT','11')
  ctx_ddl.create_preference('WP6_FILT',
                            'WP6 filter',
                            'BLASTER FILTER');
end;
For mixed-format columns using internal filters, create a Filter preference that sets the format attribute (BLASTER FILTER Tile) for the Autorecognize filter:
begin
  ctx_ddl.set_attribute('FORMAT','997')
  ctx_ddl.create_preference('MULTI_FILT',
                            'multiple internal filters',
                            'BLASTER FILTER');
end;
This section provides one example for external filters in single-format columns and one example for mixed-format columns.
|
Note: Before a Filter preference that uses external filters can be created, one or more external filters (executables) must be created and stored in the appropriate directory in your Oracle home directory. You can choose to create your own external filters or use the external filters executables provided by ConText. The examples in this section use the external filters provided by ConText. For a complete list of the external filters provided by ConText, see "Supplied External Filters" in Chapter 6, "Text Concepts". For the location of the directory for the external filter executables, see the Oracle8 installation documentation specific to your operating system. |
For a single-format column that uses external filters, create a Filter preference that uses the command attribute (USER FILTER Tile) to specify the filter executable for the format used in your column.
The following example illustrates creating a Filter preference for a column that contains documents in AmiPro format and uses the supplied external filter named amipro:
begin
  ctx_ddl.set_attribute('COMMAND','amipro')
  ctx_ddl.create_preference('AMIPRO_FILT',
                            'amipro external filter',
                            'USER FILTER');
end;
For a mixed-format column that uses external filters only or external and internal filters, create a Filter preference that sets the executable attribute (BLASTER FILTER Tile) once for each of the external filters you want to use in your column.
|
Note: The executable attribute requires that you specify a format ID which identifies the document format supported by the filter executable. For a complete list of format IDs for document formats, see "Supported External Filter Formats for Mixed-Format Columns" in Chapter 6, "Text Concepts". |
The following example illustrates creating a Filter preference for a column that contains documents in AmiPro, PDF (Adobe Acrobat), and WordPerfect 6.0 formats. It uses the supplied external filters amipro and acropdf, because these formats are not supported by the internal filters:
begin
  ctx_ddl.set_attribute('EXECUTABLE', 19,'amipro', 1)
  ctx_ddl.set_attribute('EXECUTABLE', 57,'acropdf', 2)
  ctx_ddl.create_preference('MULT_FILT',
                            'multiple filters, some external',
                            'BLASTER FILTER');
end;
If you have English-language documents in a column and you want to create a theme index for the column to enable theme queries, you need to first create a Lexer preference that calls the theme lexer, then include the preference in the policy definition for the column.
To create your own theme lexer preference, call CTX_DDL.CREATE_PREFERENCE and specify the THEME LEXER Tile.
For example:
begin
  ctx_ddl.create_preference ('MY_THEME_PREF',
                             'Pref for theme indexes',
                             'THEME LEXER');
end;
|
See Also:
For examples of creating a policy that uses the theme lexer preference, see "Creating a Theme Indexing Policy" in this chapter. |
A Stoplist preference is created by calling CTX_DDL.SET_ATTRIBUTE separately for each stop word in the list.
To define a Stoplist:
For example:
begin
  ctx_ddl.set_attribute('STOP_WORD', 'OF', 1);
  ctx_ddl.set_attribute('STOP_WORD', 'TO', 2);
  ctx_ddl.set_attribute('STOP_WORD', 'A', 3);
  . . .
  . . .
  . . .
  ctx_ddl.set_attribute('STOP_WORD', 'SO', 82);
  ctx_ddl.set_attribute('STOP_WORD', 'MOST', 83);
  ctx_ddl.set_attribute('STOP_WORD', 'MAY', 85);
  ctx_ddl.set_attribute('STOP_WORD', 'INTO', 86);
  ctx_ddl.set_attribute('STOP_WORD', 'ANY', 87);
  ctx_ddl.create_preference('MY_STOPLIST',
                            'My list of stop words',
                            'GENERIC STOP LIST');
end;
To delete a preference from the ConText data dictionary, use the PL/SQL procedure CTX_DDL.DROP_PREFERENCE.
For example:
exec ctx_ddl.drop_preference('PUB_DOCS')
To use DROP_PREFERENCE, you need to specify only the name (in this example, pub_docs) of the preference that you want to drop.
This section provides details for using the CTX_DDL PL/SQL package to perform the following policy administration tasks:
In addition, this section describes the following tasks for specific types of policies:
To create a column policy for text indexing, use the PL/SQL procedure CTX_DDL.CREATE_POLICY.
For example:
begin
  ctx_ddl.create_policy (policy_name     => 'DOC_POL',
                         colspec       => 'DOCS.ARTICLES',
                         textkey       => 'PK',
                         dstore_pref   => 'PUB_DOCS',
                         engine_pref   => 'DOC_ENGINE',
                         filter_pref   => 'WORD6',
                         lexer_pref    => 'DOC_LINK',
                         wordlist_pref => 'CTXSYS.SOUNDEX',
                         stoplist_pref => 'MINI_STOP_LIST');
end;
In this example, the name of the policy is doc_pol. The policy does not have a description, nor does it use a source policy. The text column (specified by colspec) is articles in a table named docs. The textkey for the table is pk.
The preferences used in the policy are all user-owned policies, except for the Wordlist preference, which uses the predefined preference named SOUNDEX.
The following conditions apply to the colspec and textkey parameters in CREATE_POLICY:
It is not necessary to specify a Compressor preference when creating a policy. ConText uses the predefined NULL COMPRESSOR preference as the default.
In a policy, you can use preferences owned by other users; however, you must specify the fully qualified name of the preference. For example, to specify a preference owned by CTXSYS, such as the SOUNDEX preference, use the following syntax: CTXSYS.pref_name (e.g. CTXSYS.soundex).
In addition, if you use a source policy in a policy, you can specify either your template policies or the CTXSYS-owned template policies; however, you must specify the fully-qualified name of the template policy.
To create a theme indexing policy, use the PL/SQL procedure CTX_DDL.CREATE_POLICY and specify either your own theme lexer preference or the predefined preference (THEME_LEXER) provided by ConText.
The following example illustrates how to create a policy identical to the previous policy example, except that my_theme_pref, the theme lexer preference created in the theme lexer example, is used in place of doc_link, which is a preference that calls the basic (indexing) lexer:
begin
  ctx_ddl.create_policy (policy_name   => 'DOC_POL',
                         colspec       => 'DOCS.ARTICLE',
                         textkey       => 'PK',
                         dstore_pref   => 'PUB_DOCS',
                         engine_pref   => 'DOC_ENGINE',
                         filter_pref   => 'WORD6',
                         lexer_pref    => 'MY_THEME_PREF',
                         wordlist_pref => 'CTXSYS.SOUNDEX',
                         stoplist_pref => 'MINI_STOP_LIST');
end;
When index creation is requested for this theme indexing policy, the theme lexer generates a theme index that can be used to perform theme queries.
|
See Also:
For an example of creating a theme lexer preference, see "Creating a Theme Lexer Preference" in this chapter. For more information about theme indexes and queries, see "Theme Indexes" in Chapter 6, "Text Concepts". |
To create a policy that uses a composite textkey, use the PL/SQL procedure CTX_DDL.CREATE_POLICY; however, when you specify the textkey for the column, reference each of the primary or unique key columns (up to 16) that constitute the composite textkey for the column.
For example:
begin
  ctx_ddl.create_policy (policy_name   => 'DOC_POL',
                         colspec       => 'DOCS.ARTICLE',
                         textkey       => 'AUTH,TITLE',
                         dstore_pref   => 'PUB_DOCS',
                         engine_pref   => 'DOC_ENGINE',
                         filter_pref   => 'WORD6',
                         lexer_pref    => 'DOC_LINK',
                         wordlist_pref => 'CTXSYS.SOUNDEX',
                         stoplist_pref => 'MINI_STOP_LIST');
end;
In this example, the textkey for the articles column is a composite textkey consisting of the columns auth and title in the docs table. The names of the textkey columns are separated by commas and are registered in the ConText data dictionary in the order in which they are specified.
|
Note: There is a 256 character limit, including the comma separators, on the combined length of the column names in a composite textkey. Also, there is a 256 character limit on the combined length of the columns in a composite textkey. For more information about these limits, see "Composite Textkeys" in Chapter 6, "Text Concepts". |
To create a template policy, use the PL/SQL procedure CTX_DDLCREATE_TEMPLATE_POLICY.
For example:
begin
  ctx_ddl.create_template_policy (policy_name   => 'TEMPLATE_POL',
                                  dstore_pref   => 'PUB_DOCS',
                                  engine_pref   => 'DOC_ENGINE',
                                  filter_pref   => 'WORD6',
                                  lexer_pref    => 'DOC_LINK',
                                  wordlist_pref => 'SOUNDEX_YES',
                                  stoplist_pref => 'MINI_STOP_LIST');
end;
In this example, the name of the policy is template_pol. The preferences for the policy are as specified above. If template_pol is specified as a source policy when creating a new policy, its preferences are copied to the new policy.
|
Note: You can also use CTX_DDL.CREATE_POLICY to create a template policy. When you call CREATE_POLICY, do not specify a value for colspec. |
To modify a policy, use the PL/SQL procedure CTX_DDL.UPDATE_POLICY.
For example:
begin
  ctx_ddl.update_policy (policy_name   => 'DOC_POL',
                         filter_pref   => 'HTML_DOC',
                         wordlist_pref => 'CTXSYS.NO_SOUNDEX');
end;
In this example, a Filter preference named html_doc replaces the existing preference for the Filter category, while the predefined Wordlist preference named NO_SOUNDEX replaces the existing preference for the Wordlist category.
To delete a policy from the ConText data dictionary, use the PL/SQL procedure CTX_DDL.DROP_POLICY.
For example:
execute ctx_ddl.drop_policy ('DOC_POL')
To use DROP_POLICY, you only need to specify the name (in this example, doc_pol) of the policy that you want to drop.

This section provides details for using the CTX_DDL PL/SQL package to perform the following indexing tasks:
To create a ConText index (theme or text), use the CTX_DDL.CREATE_INDEX procedure.
The only argument required for CREATE_INDEX is the name of the policy for the text column to be indexed.
For example:
execute ctx_ddl.create_index('DOC_POL')
In this example, CREATE_INDEX creates an index for the text column defined in a policy named doc_pol.
To create the ConText index tables without populating the tables, use the pop_index parameter in CTX_DDL.CREATE_INDEX.
For example:
execute ctx_ddl.create_index('DOC_POL', pop_index => FALSE)
This example creates the ConText index tables for the doc_pol policy without populating the tables with index entries.
To populate the tables, the CTX_DML.REINDEX procedure can be called for each of the rows (documents) in the table for doc_pol or, if automatic DML is enabled, update each of the rows in the table.
You can optionally include a numeric value in the argument string for CTX_DDL.CREATE_INDEX to specify the number of ConText servers used for parallel indexing.
For example:
execute ctx_ddl.create_index('DOC_POL', 4)
In this example, CREATE_INDEX uses the first four available ConText servers with the DDL personality to create an index in parallel for the text column defined in the doc_pol policy.
|
See Also:
For more information about ConText indexing in parallel, see "Parallel Indexing" in Chapter 6, "Text Concepts". |
ConText indexing in parallel does not automatically cause the Oracle indexes on the ConText index tables to be created in parallel.
To have Oracle8 create Oracle indexes in parallel, the parallel query option for Oracle8 must be installed. In addition, a value must be specified for the PARALLEL clause used in the CREATE INDEX command.
To specify a value for the PARALLEL clause used in the CREATE INDEX command for the Oracle index created on the token table in the ConText index, use the i1i_other_params attribute (GENERIC ENGINE Tile) in the Engine preference for the column policy.
To set the PARALLEL clause for the Oracle indexes created on the other tables in the ConText index, use the kid_other_params, kik_other_params, lix_other_params, and sri_other_params attributes.
For example:
begin
  ctx_ddl.set_attribute('I1I_OTHER_PARMS', ' PARALLEL 4');
  ctx_ddl.set_attribute('KID_OTHER_PARMS', ' PARALLEL 4');
  ctx_ddl.set_attribute('KIK_OTHER_PARMS', ' PARALLEL 4');
  ctx_ddl.create_preference('PAR_INDEX',
                            'Parallel indexing x 4',
                            'GENERIC ENGINE');
end;
In this example, an Engine preference named par_index is created with a PARALLEL value of 4 for the Oracle indexes created on the token and document mapping tables in ConText indexes.
If the par_index preference is used in a column policy, when a ConText index is created for the policy, four Oracle8 server processes create the indexes in parallel for the token and document mapping tables.
|
See Also:
For more information about the PARALLEL clause in the CREATE INDEX and CREATE TABLE commands, see Oracle8 Server SQL Reference. For more information about the parallel query option, see Oracle8 Server Tuning. |
ConText does not require you to create new tables or modify existing tables to create indexes for text already stored in a database. If you already have text stored in a column in an existing database, you can use ConText to index the text in the column without changing the structure of the table itself. Once the column has an index, queries can be submitted against the column.
The only requirements are:
The procedure for indexing an existing text column is identical to the procedure for indexing a new text column:
|
See Also:
For examples of creating preferences and policies, see "Creating a Preference" and "Creating a Column Policy" in this chapter. For an example of creating a ConText index, see "Creating an Index" in this chapter. |
Once an index is created for a text column, ConText automatically updates the index each time a document (row) is added, deleted, or modified in the table.
In addition, the index can be manually updated for a single document using CTX_DML.REINDEX.
To drop an existing index from the data dictionary, use the PL/SQL procedure CTX_DDL.DROP_INDEX.
For example:
execute ctx_ddl.drop_index ('DOC_POL')
In this example, the index and associated tables for doc_pol are deleted from the database. If you wanted to perform subsequent text queries against the text column for doc_pol, the index for the column in doc_pol must be recreated using CTX_DDL.CREATE_INDEX.
Index optimization can be used to help reduce the size of ConText indexes, as well as update the indexes to reflect deleted/modified documents.
To optimize an index in the data dictionary, use the PL/SQL procedure, CTX_DDL.OPTIMIZE_INDEX.
For example:
execute ctx_ddl.optimize_index('DOC_POL', ctx_ddl.defragment_to_new_table);
In this example, the optimization method used for the ConText index for doc_pol is defragment_to_new_table. This method uses a second, mirror ConText index table to compact the index fragments for all indexed terms with multiple fragments and remove references from the index strings for all deleted/modified documents.
|
See Also:
For more information about ConText index optimization, see "Index Optimization" in Chapter 6, "Text Concepts" |
Similar to index creation, index optimization can be performed in parallel. To perform parallel index optimization, specify a degree of parallelism when calling the OPTIMIZE_INDEX procedure.
For example:
begin
  ctx_ddl.optimize_index(policy_name => 'DOC_POL',
                         optyp       => ctx_ddl.defragment_to_new_table,
                         parallel    => 4);
end;
In this example, OPTIMIZE_INDEX is called for doc_pol with an optimization method of defragment_to_new_table and degree of parallelism of 4.
|
Note: The parallel issues for Oracle index creation on ConText index tables apply to ConText index optimization as well. For more information about the issues regarding parallel index creation, see "Parallel Creation of Oracle Indexes" in this chapter. |
If an index operation (creation or optimization) fails, you can use the PL/SQL procedure CTX_DDL.RESUME_FAILED_INDEX to resume the operation once the reason for the failure has been determined and corrected/removed.
For example:
execute ctx_ddl.resume_failed_index('DOC_POL')
In this example, text DDL operation is the default (index creation) and is resumed for the text column for the doc_pol policy.
You can also choose to start the index operation over from the beginning using CTX_DDL.CREATE_INDEX or CTX_DDL.OPTIMIZE_INDEX.
You can view the index log in the GUI administration tools or through the CTX_INDEX_LOG view to determine when and where the index operation failed.
The log also can be used to determine whether to resume the operation or simply start the operation over, based on the stage at which the operation failed and/or the percentage of the operation completed before failure.
This section provides details for using the CTX_THES PL/SQL package and/or ctxload to perform the following indexing tasks:
Thesauri viewing is not covered in this manual because viewing thesauri terms and relationships is best handled through a graphical interface, such as the System Administration tool, which is provided with the ConText Workbench.
To create a thesauri, use the PL/SQL function CTX_THES.CREATE_THESAURUS or use the ctxload command-line utility.
|
Note: CREATE_THESAURUS creates a thesaurus with no entries. ctxload creates a thesaurus using a thesaurus import file. The file can contain thesaurus entries or can be empty. To add entries to a thesaurus, you must use CTX_THES.CREATE_PHRASE. |
The following SQL*Plus example creates an empty thesaurus named tech_thes using CREATE_THESAURUS:
variable thesid number
execute :thesid := ctx_ddl.create_thesaurus('tech_thes')
The following command-line example creates a thesaurus named science_thes using ctxload:
ctxload -user ctxdev/passwd -thes -name science_thes -file sci_terms.txt
In this example, the owner of the thesaurus is an Oracle user named ctxdev. The -thes argument specifies that ctxload is used to create/import a thesaurus. The name of the thesaurus import file is sci_terms.txt.
|
See Also:
For a complete description of ctxload requirements and options, as well as the structure and syntax of the thesaurus import file, see Chapter 10, "Text Loading Utility". |
To create a case-sensitive thesaurus that contains no entries, use CTX_THES.CREATE_THESAURUS and specify TRUE for case_sensitive.
To create a case-sensitive thesaurus with entries, use ctxload and the -thescase argument.
The following example creates an empty, case-sensitive thesaurus named science_terms. ConText retains the case of all terms that are subsequently entered in the thesaurus:
variable thesid number
execute :thesid := ctx_ddl.create_thesaurus('scinece_terms',TRUE)
The following UNIX-based example creates a case-sensitive thesaurus named science_terms and populates the thesaurus with entries from a file named science.thes:
ctxload -thes -thescase y -name science_terms -file science.thes
To create a entry in an existing thesaurus or update an existing entry, use the PL/SQL function CTX_THES.CREATE_PHRASE. The only update allowed for an existing entry is the definition of a new relationship between the phrase in the entry and another phrase in the thesaurus.
The following SQL*Plus example creates two new phrases (intranet and world wide web) in a thesaurus named tech_thes:
variable phraseid number
execute :phraseid := ctx_ddl.create_phrase('tech_thes','intranet')
execute :phraseid := ctx_ddl.create_phrase('tech_thes','world wide web')
The following SQL*Plus example establishes the phrase intranet as a narrower partitive term for world wide web in tech_thes:
variable phraseid number
execute :phraseid := ctx_ddl.create_phrase('tech_thes','intranet','NTP','world wide web')
To delete an existing thesaurus, use the PL/SQL procedure CTX_THES.DROP_THESAURUS.
For example:
execute ctx_ddl.drop_thesaurus('science_thes')
In this example, a thesaurus named science_thes and all of its entries are deleted from the thesaurus tables.
To create an output file containing all the entries for an existing thesaurus, use the ctxload command-line utility.
For example:
ctxload -user ctxdev/passwd -thesdump -name tech_thes -file tech_terms.out
In this example, the owner of the thesaurus is an Oracle user named ctxdev. The -thesdump argument specifies that ctxload is used to create/export a thesaurus output file. The name of the thesaurus import file is tech_terms.out and it is created in the directory from which ctxload is run.
|
See Also:
For a complete description of ctxload requirements and options, as well as the structure and syntax of the thesaurus import file, see Chapter 10, "Text Loading Utility". |

This section provides details for creating sections and section groups and assigning a section group to a text column via the policy for the column:
To create a section group, use the CTX_DDL.CREATE_SECTION_GROUP procedure. The only argument required for CREATE_SECTION_GROUP is the name of the section group to be created.
For example:
exec ctx_ddl.create_section_group('HTML_SECTIONS')
To create a section and assign the section to a section group, use the CTX_DDL.ADD_SECTION procedure. The ADD_SECTION procedure requires you to enter a name for the section, the name of the section group to which the section is assigned, start and end tags for the section, and whether the section is a top-level section or self-enclosing.
For example:
exec ctx_ddl.add_section('HTML_SECTIONS','HEAD','<HEAD>','</HEAD>',true,false)
In this example, the name of the section is head, the start and end tags for the section are <HEAD> and </HEAD>, and the section is defined as a top-level section, meaning the section ends when an end tag for the section or a start tag for another top-level section is encountered.
|
Note: For the strings <HEAD> and </HEAD> to be treated as start and end tags in HTML documents, both strings must be specified for the keep_tag attribute (HTML FILTER Tile) and the startjoins and endjoins attributes (BASIC LEXER Tile) must be set. For examples of setting these attributes, see "Filter Examples" and "Lexer Examples" in Chapter 7, "Understanding the ConText Data Dictionary: Indexing". |
To create a Wordlist preference for sections in a text column, set the section_group attribute (GENERIC WORD LIST Tile), then use CTX_DDL.CREATE_PREFERENCE to create a preference for the Tile.
For example:
exec ctx_ddl.set_attribute(\QSECTION_GROUP','HTML_SECTIONS');
exec ctx_ddl.create_preference(\Qhtml_sect','HTML sections','GENERIC WORD LIST');
To use the preference in a policy, use CTX_DDL.CREATE_POLICY and specify the name of the preference.
For example:
ctx_ddl.create_policy(\Qhtml_pol','docs.text',wordlist_pref=>'html_sect');
To view all the sections and section groups that have been created in the ConText data dictionary, use the CTX_ALL_SECTIONS and CTX_ALL_SECTIONS views.
To view only the sections and section groups that you have created, use the CTX_USER_SECTIONS and CTX_USER_SECTION_GROUPS views.
To remove a section from a section group, use the CTX_DDL.REMOVE_SECTION procedure and specify the name of the section group to which the section belongs and the name of the section to remove.
For example:
exec ctx_ddl.remove_section('headers','heading1')
To remove all the sections from a section group, you must call REMOVE_SECTION for each section in the group. You can also drop the section group, which automatically removes all sections defined for the group.
To drop a section group (and all of its sections) from the ConText data dictionary, use the CTX_DDL.DROP_SECTION_GROUP procedure and specify the name of the section group to drop.
For example:
exec ctx_ddl.remove_section('headers','heading1')