Basic layout
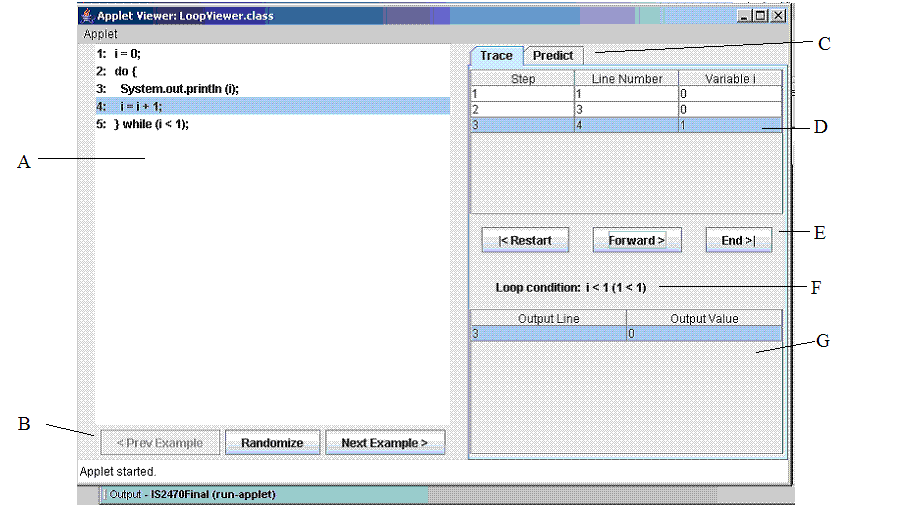
The basic layout of LoopViewer is shown in the image.
(A) shows the code currently being executed. The blue line is the line that has just been executed. (B) are buttons to change programs. The tabs in (C) is used to change between tracing a program and predicting the output of a progam.
To change program
To change a program, the buttons in (B) are used. Programs are divided into level of difficulty. Press 'Previous examples' and 'Next examples' to change level of difficulty. The user always start with the first level.The 'change program' button allows the user to change to a randomly selected program from the current level.
Stepping through a program
The user can step through the execution of a program by pressing the next button in (E). The user can also restart the execution or go to the end of the execution.The table (D) reflects the values of the variables at every execution step. The latest one is marked in blue. (G) shows the output of the program. This part only changes when the program executes an output statement. The text in (F) shows the status of the current innermost loop condition. The status shows the actual text of the condition followed by the numerical values of the condition. This changes according to the loop. When the value of the condition is true the color is blue, when false, the color is red.
Predicting Output of Program
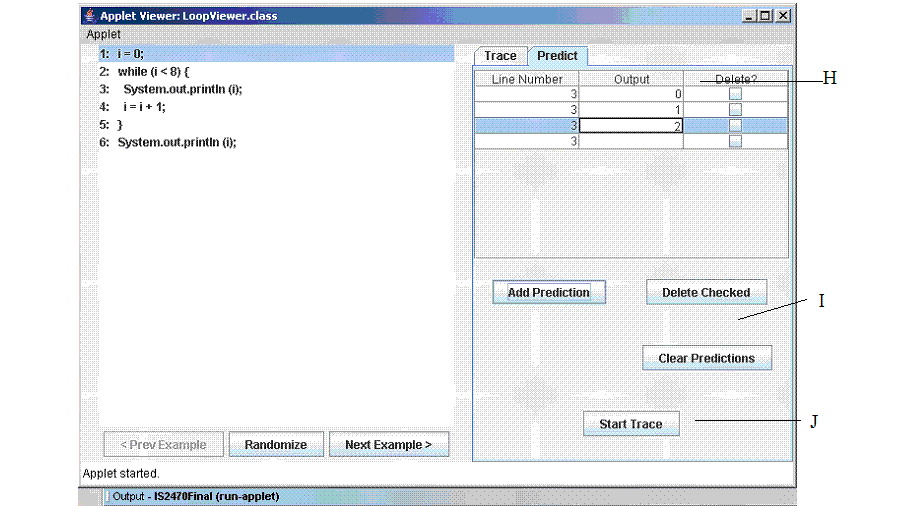
The user can try to predict outputs of the program. To do this first click the predict tab on (C). The panel will show the predict panel as shown in the second image. The user adds input by first pressing "Add Prediction" in (I). The user can then insert the value of what he thinks the program will output in order (H). The user should also choose the line number that creates the output
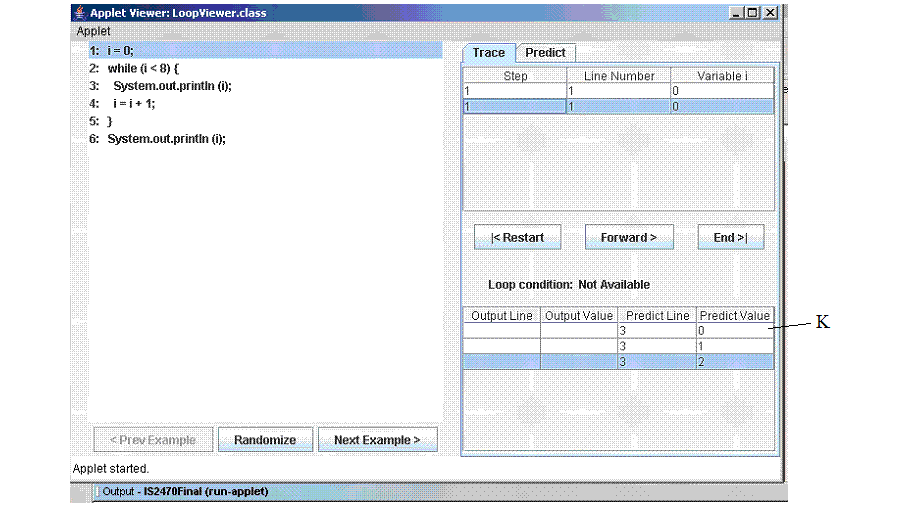
Once the user finishes with his prediction he presses the start trace button (J) which wil bring him up to the trace screen. The trace screen will show the predicted output adjacent to the trace output. The user will be able to compare the two outputs.